
In my previous blog post ‘Let’s flow your Business Central data into Microsoft Fabric’ I showed you how to use the Dataflow of Business Central to flow your data into Microsoft Fabric.
If you refresh the dataflow it will load all your data of the tables again in your Microsoft Fabric Onelake. It doesn’t use the deltas.
But there is also an API for Onelake to upload your data: OneLake access and APIs – Microsoft Fabric | Microsoft Learn
The API doesn’t differ much from the Data Lake Gen2 API: Azure Data Lake Storage Gen2 REST API reference – Azure Storage | Microsoft Learn
And since we have the tool BC2ADLS: microsoft/bc2adls: Exporting data from Dynamics 365 Business Central to Azure data lake storage (github.com)
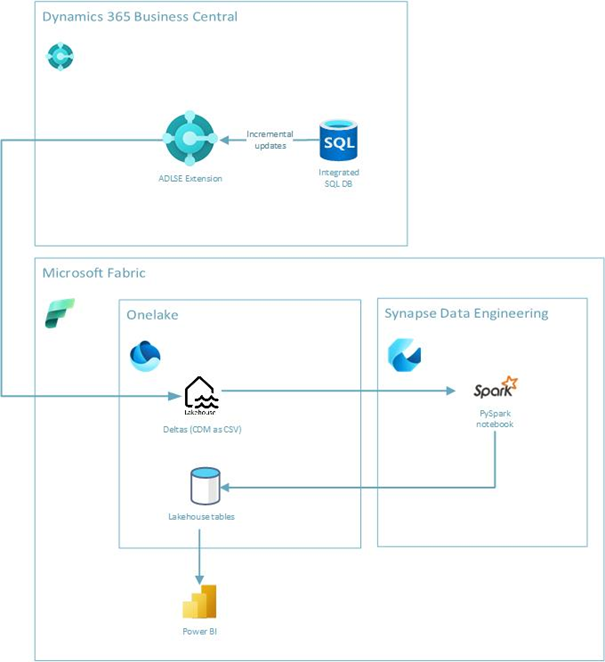
This extension exports Business Central data into an Azure Data Lake we can transform that into the Onelake of Microsoft Fabric!
In part 1 we will discover the Business Central Side. In the next part, we will discover the Microsoft Fabric side.
NB: this is still a proof of concept and not pushed into the main branch of the BC2ADLS repo.
The source code you can find here: Bertverbeek4PS/bc2adls at Microsoft-Fabric-Integration (github.com)
We are importing the data as files into a lakehouse inside Microsoft Fabric.ᅠ A lakehouse is for unstructured data and can consist of tables and files. A warehouse is for structured data and has only tables. Since Business Central is structured data but we are uploading files, we are importing it in a lakehouse. From there we are creating tables in the lakehouse:
For more differences between a lakehouse and warehouse, you can take a look here: Fabric decision guide – lakehouse or data warehouse – Microsoft Fabric | Microsoft Learn
Authentication
You can authenticate OneLake APIs using Microsoft Azure Active Directory (Azure AD) by passing through an authorization header. If a tool supports logging into your Azure account to enable AAD passthrough, you can select any subscription – OneLake only requires your AAD token and doesn’t care about your Azure subscription.
So in this case we have to create an app registration in the Azure portal with the following API Permissions:
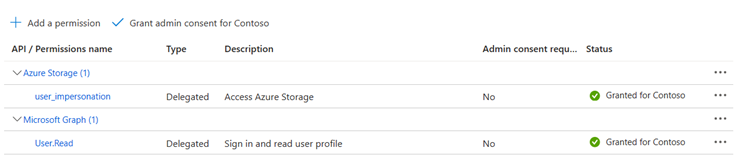
This must be granted by a global admin since it uses username and password.
Also we use https://storage.azure.com/.default as scope and https://storage.azure.com/ as resource.
Creation of the delta file
If we have authenticate we have to create a file.
The url of onelake is as follow:
https://onelake.dfs.fabric.microsoft.com/<workspace>/<item>.<itemtype>/<path>/<fileName>
In my example my workspace is called FabricTest and my lakehouse is called BusinessCentral.
So to base URL would be:
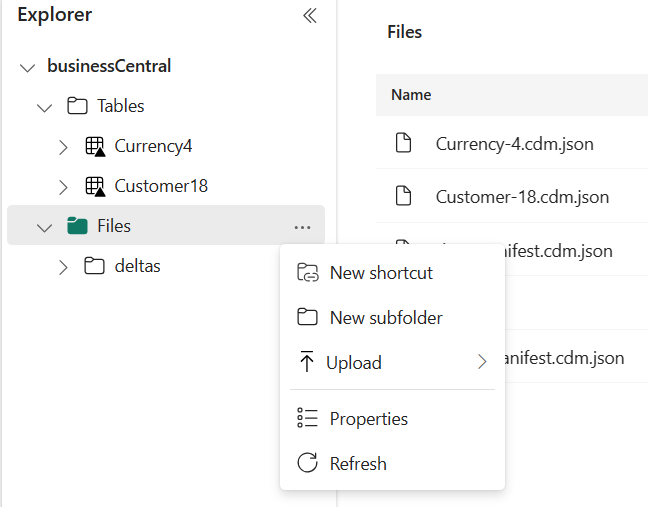
https://onelake.dfs.fabric.microsoft.com/FabricTest/BusinessCentral.Lakehouse/Files
You can also look it up in your lakehouse:
And when we want to create a file we have to call the base URL with ‘?resource=file’. When we have done that, we can create files into Onelake.
Adding data to the file
After the file is created we have to put the delta’s in a CSV format into the created file. For this, we have to call the file with ‘?position=0&action=append&flush=true’.
This way, we append to the fill the created file on position 0.
Implementing in the BC2ADLS extension
When we are implementing it in the bc2adls we first have to create a setup:
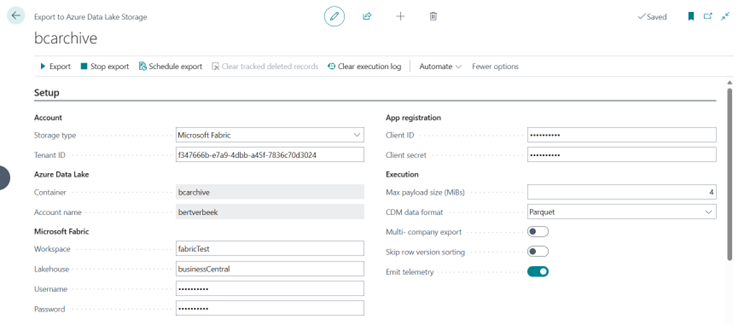
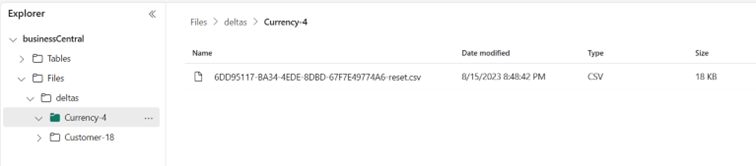
We have to fill in the Workspace, Lakehouse, Username and password. After that we can select the tables and fields as usual and if we export the files they are exported into the Lakehouse inside MS Fabric in the same structure as exporting to the Azure Data Lake:
After this we have to consolidate the delta’s into a table and remove the deleted records. This will be done in part 2.
-
Share this blog